Autism Agent tutorial
Scroll the guide — the live preview follows along. Or jump to any step below.
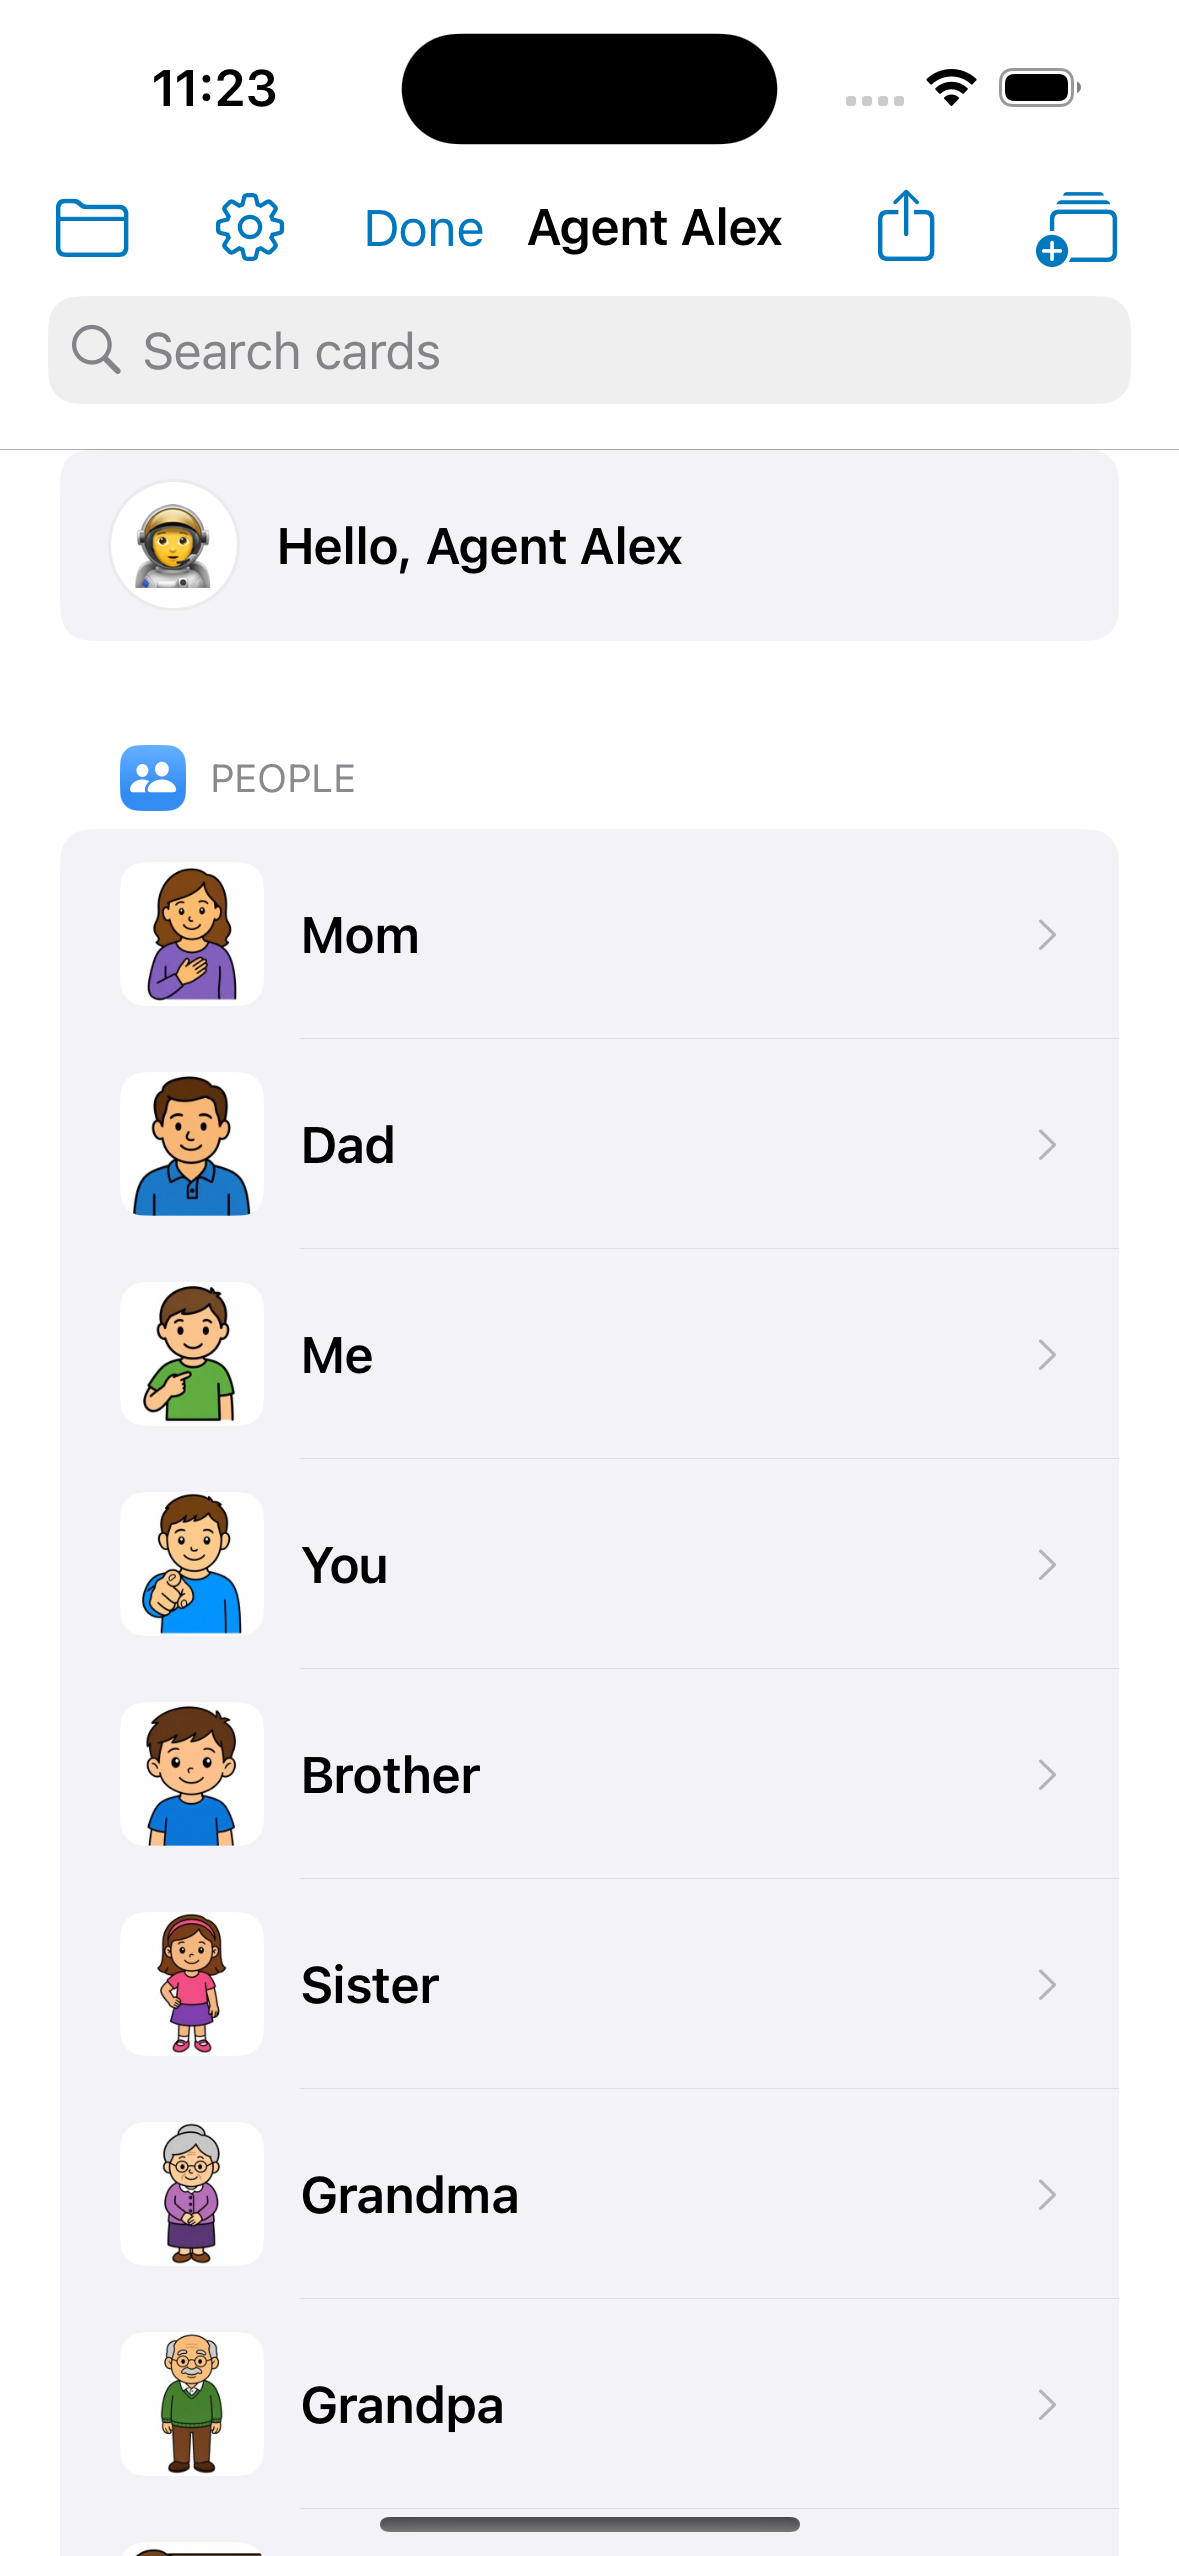
Pick an agent name, load starter cards, choose device role.
App screenshots
Click any screen to enlarge. The same gallery appears on the home page demo.
1. Install and first-time setup
-
Download the app
Install Autism Agent from the App Store on the caregiver's iPhone or iPad when it launches. Core AAC features will be free — no account required to start.
-
Complete agent setup
On first launch you pick an agent name and emoji. This is the friendly identity on the Speak screen — it helps some kids feel ownership of the board. You can change the emoji later by tapping it on the Speak screen.
-
Starter cards load automatically
128 common words with pictograms appear right away (Yes, No, More, Help, food, feelings, places, and more). Swap in your own photos anytime from Admin.
-
Choose device role
In Control Panel → Device Role, pick Manages cards on the parent's device. Pick Viewer only on a child's device when you only want read-only access to shared cards.
2. Speak mode — say one word
The main screen is calm and distraction-free. This is what the person communicating uses day to day.
-
Tap a picture
Each card speaks its label instantly. Great for single words: Yes, No, More, Help, or any custom photo you add.
-
Filter by category
Scroll the category chips above the grid — People, Food, Feelings, Places, and others. Tap All to see every card again.
-
Partner line (optional)
When enabled in Control Panel, the last spoken word appears under the agent bar. Tap it to hear it again or jump into editing.
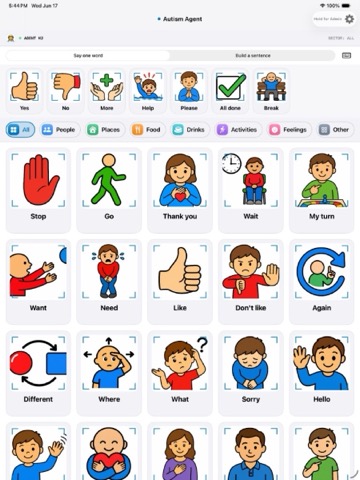
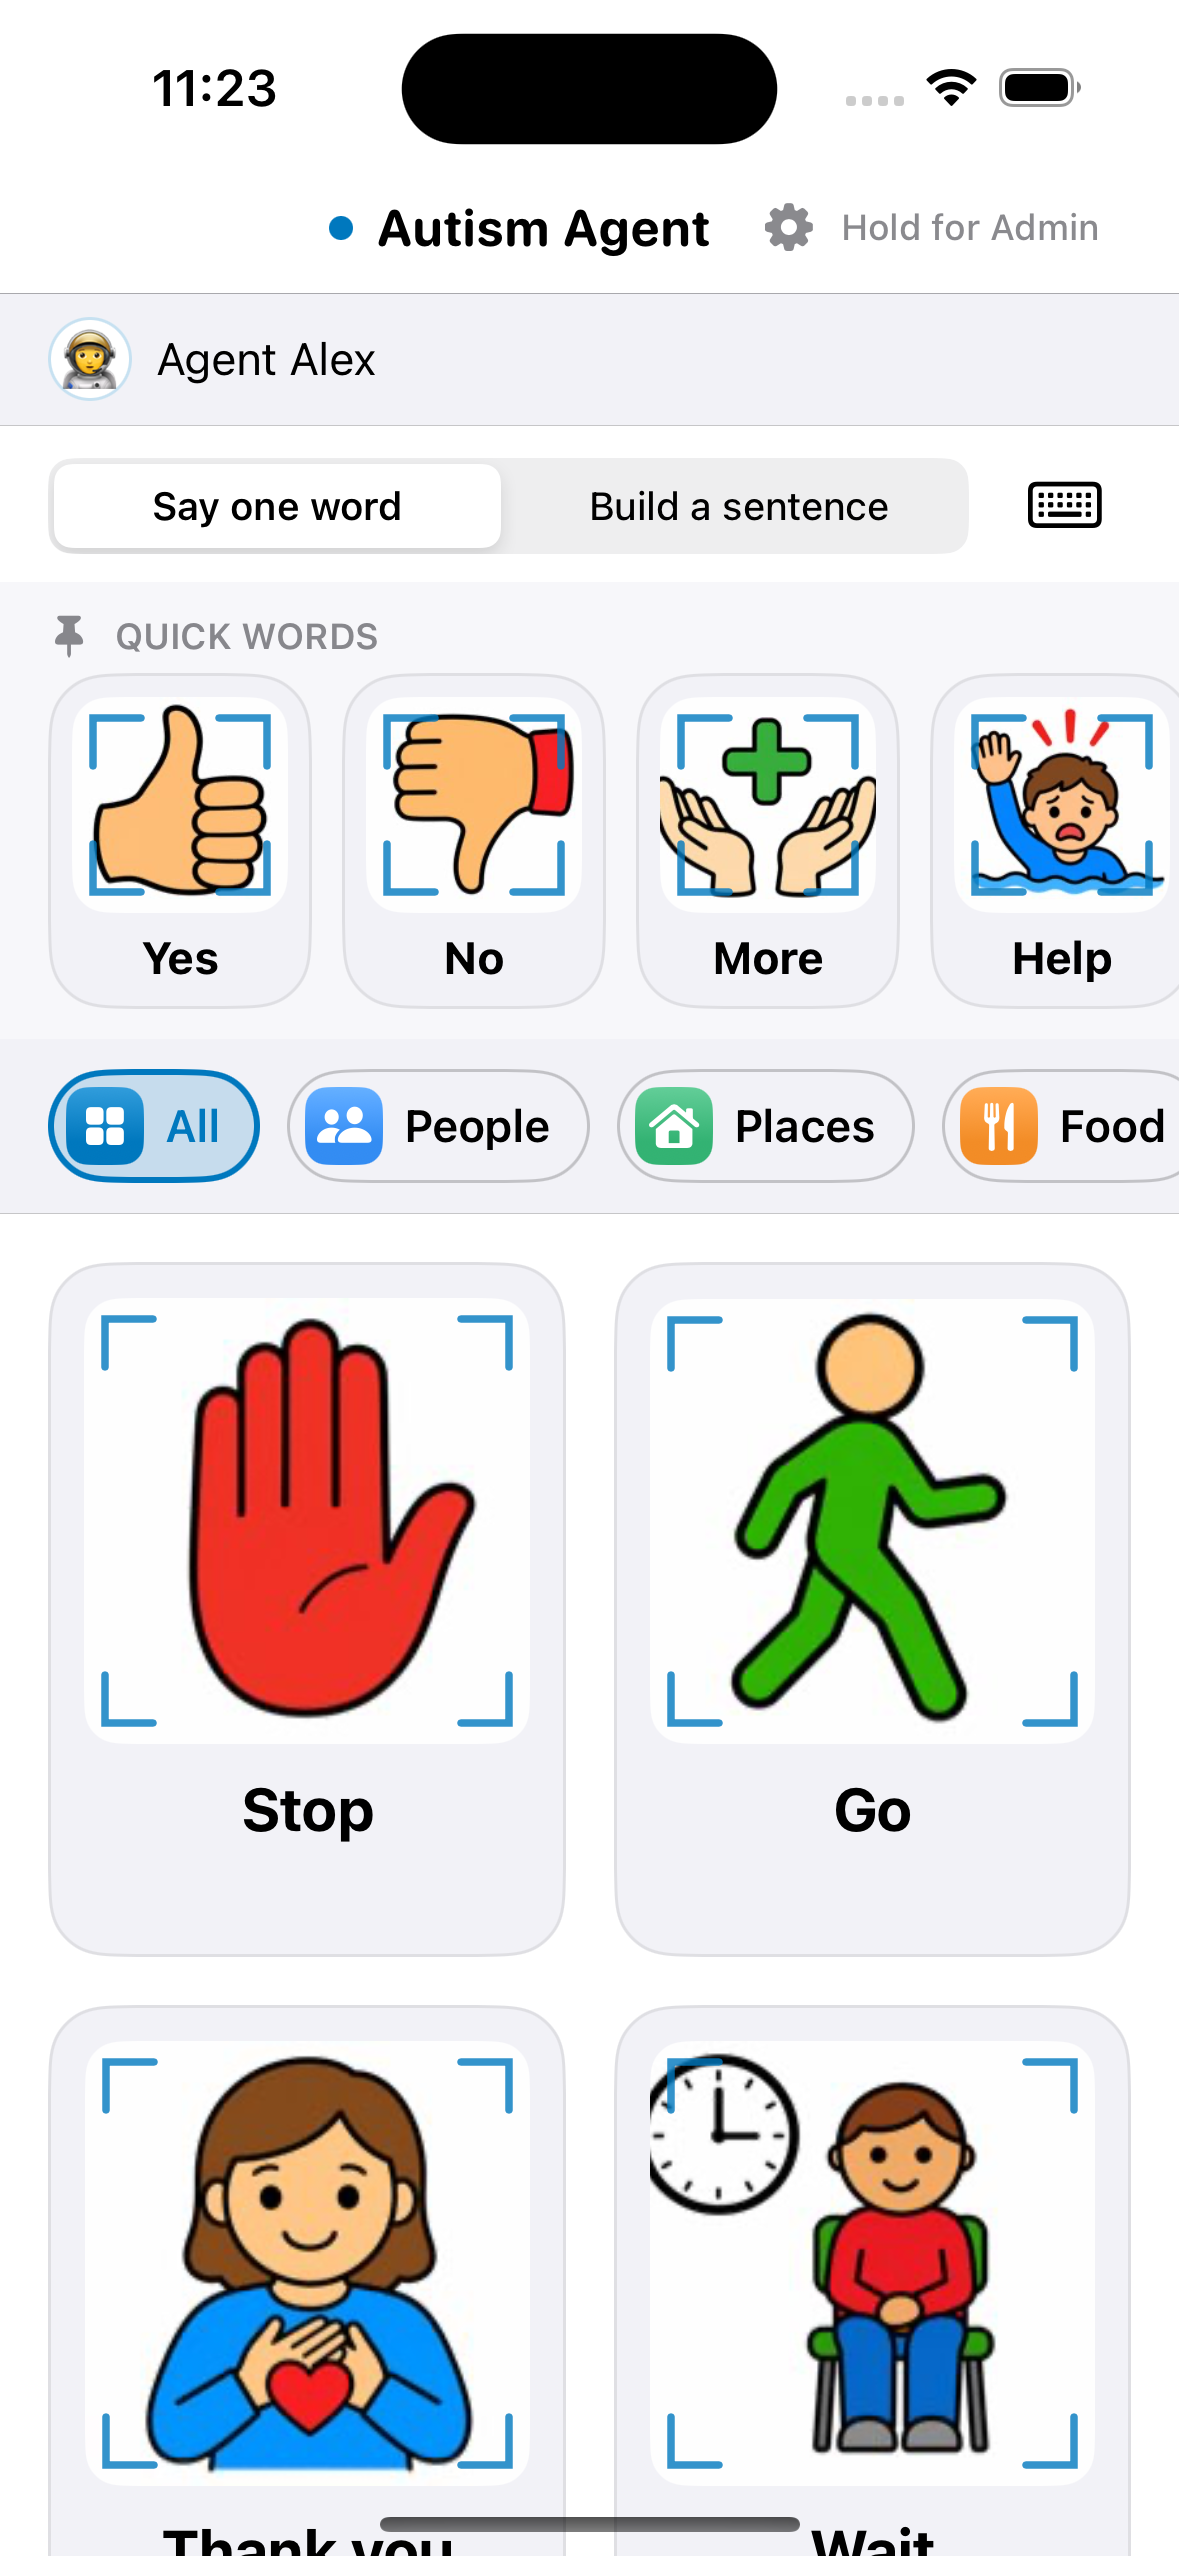
3. Quick Words
The row above the grid keeps your most-used words one tap away.
-
Default pins
Yes, No, More, Help, and other core words pin automatically the first time cards load.
-
Pin a card
On the caregiver device, drag any card up into the Quick Words row. Drop it on the row to pin.
-
Unpin a card
Drag a pinned card back down onto the grid to remove it from Quick Words.
-
Empty row stays visible
If you clear every pin, the row remains so you can always drag new words in — it never disappears.
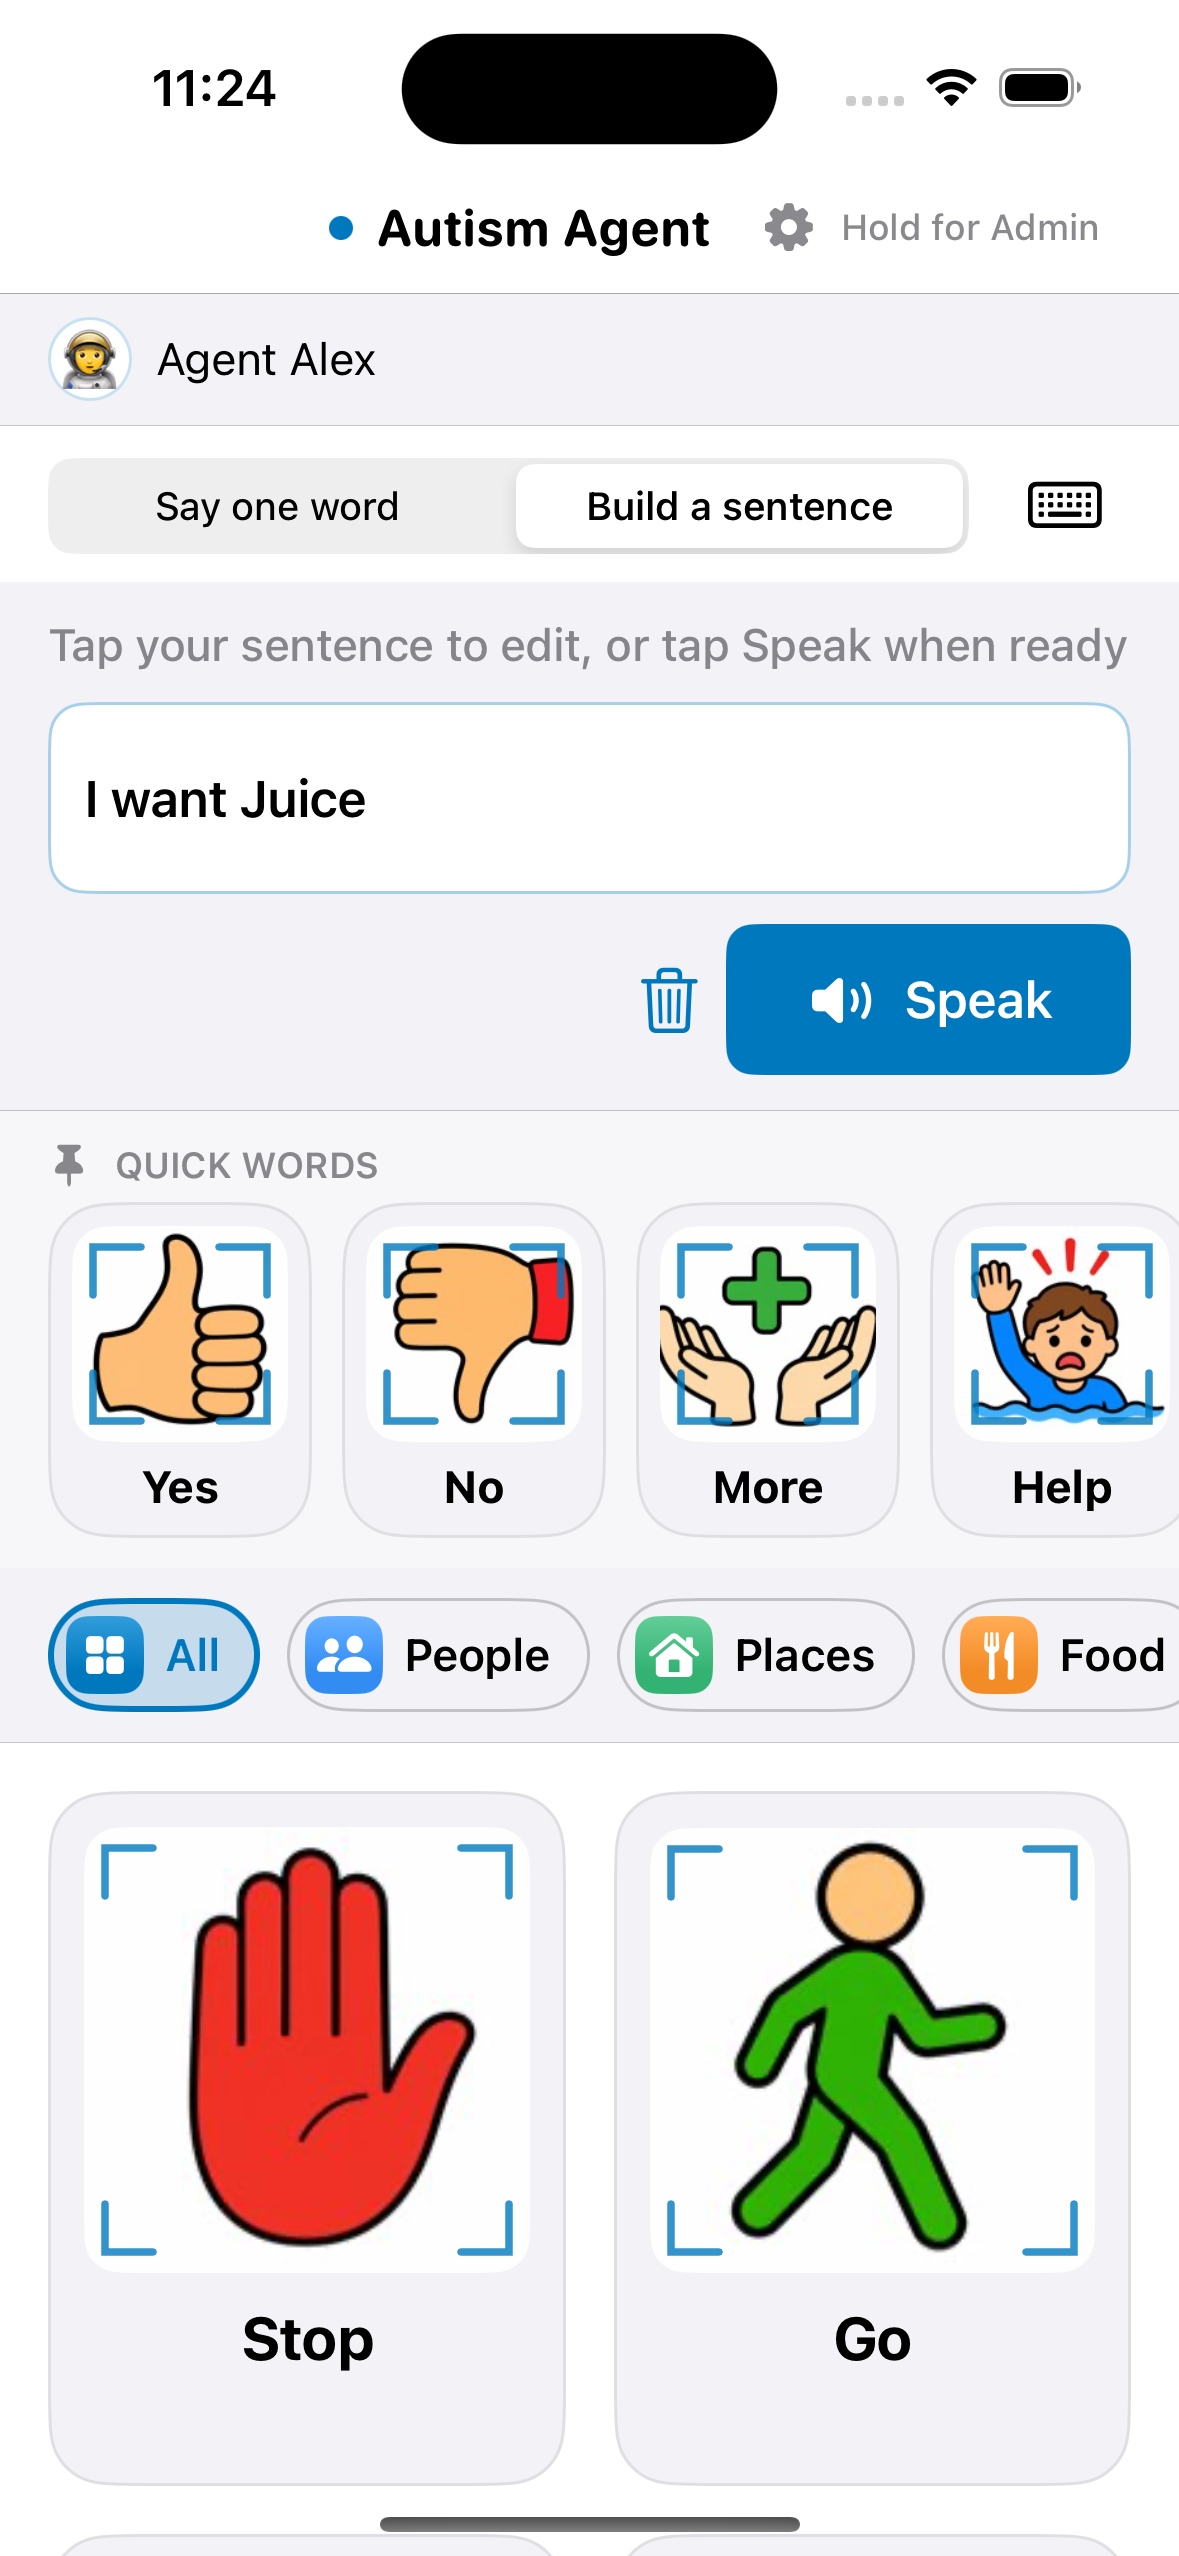
4. Build a sentence
Combine words into full messages before speaking.
-
Switch mode
On the mode bar, choose Build a sentence (instead of Say one word).
-
Add words
Tap picture cards to add chips to the sentence bar — for example I → want → juice. Each tap adds to the message without speaking the full sentence yet.
-
Speak the sentence
When the message is ready, tap Speak. The full phrase is read aloud, then the bar clears for the next message.
-
Edit chips
Tap a chip to remove it or change it. Use Clear to start over.
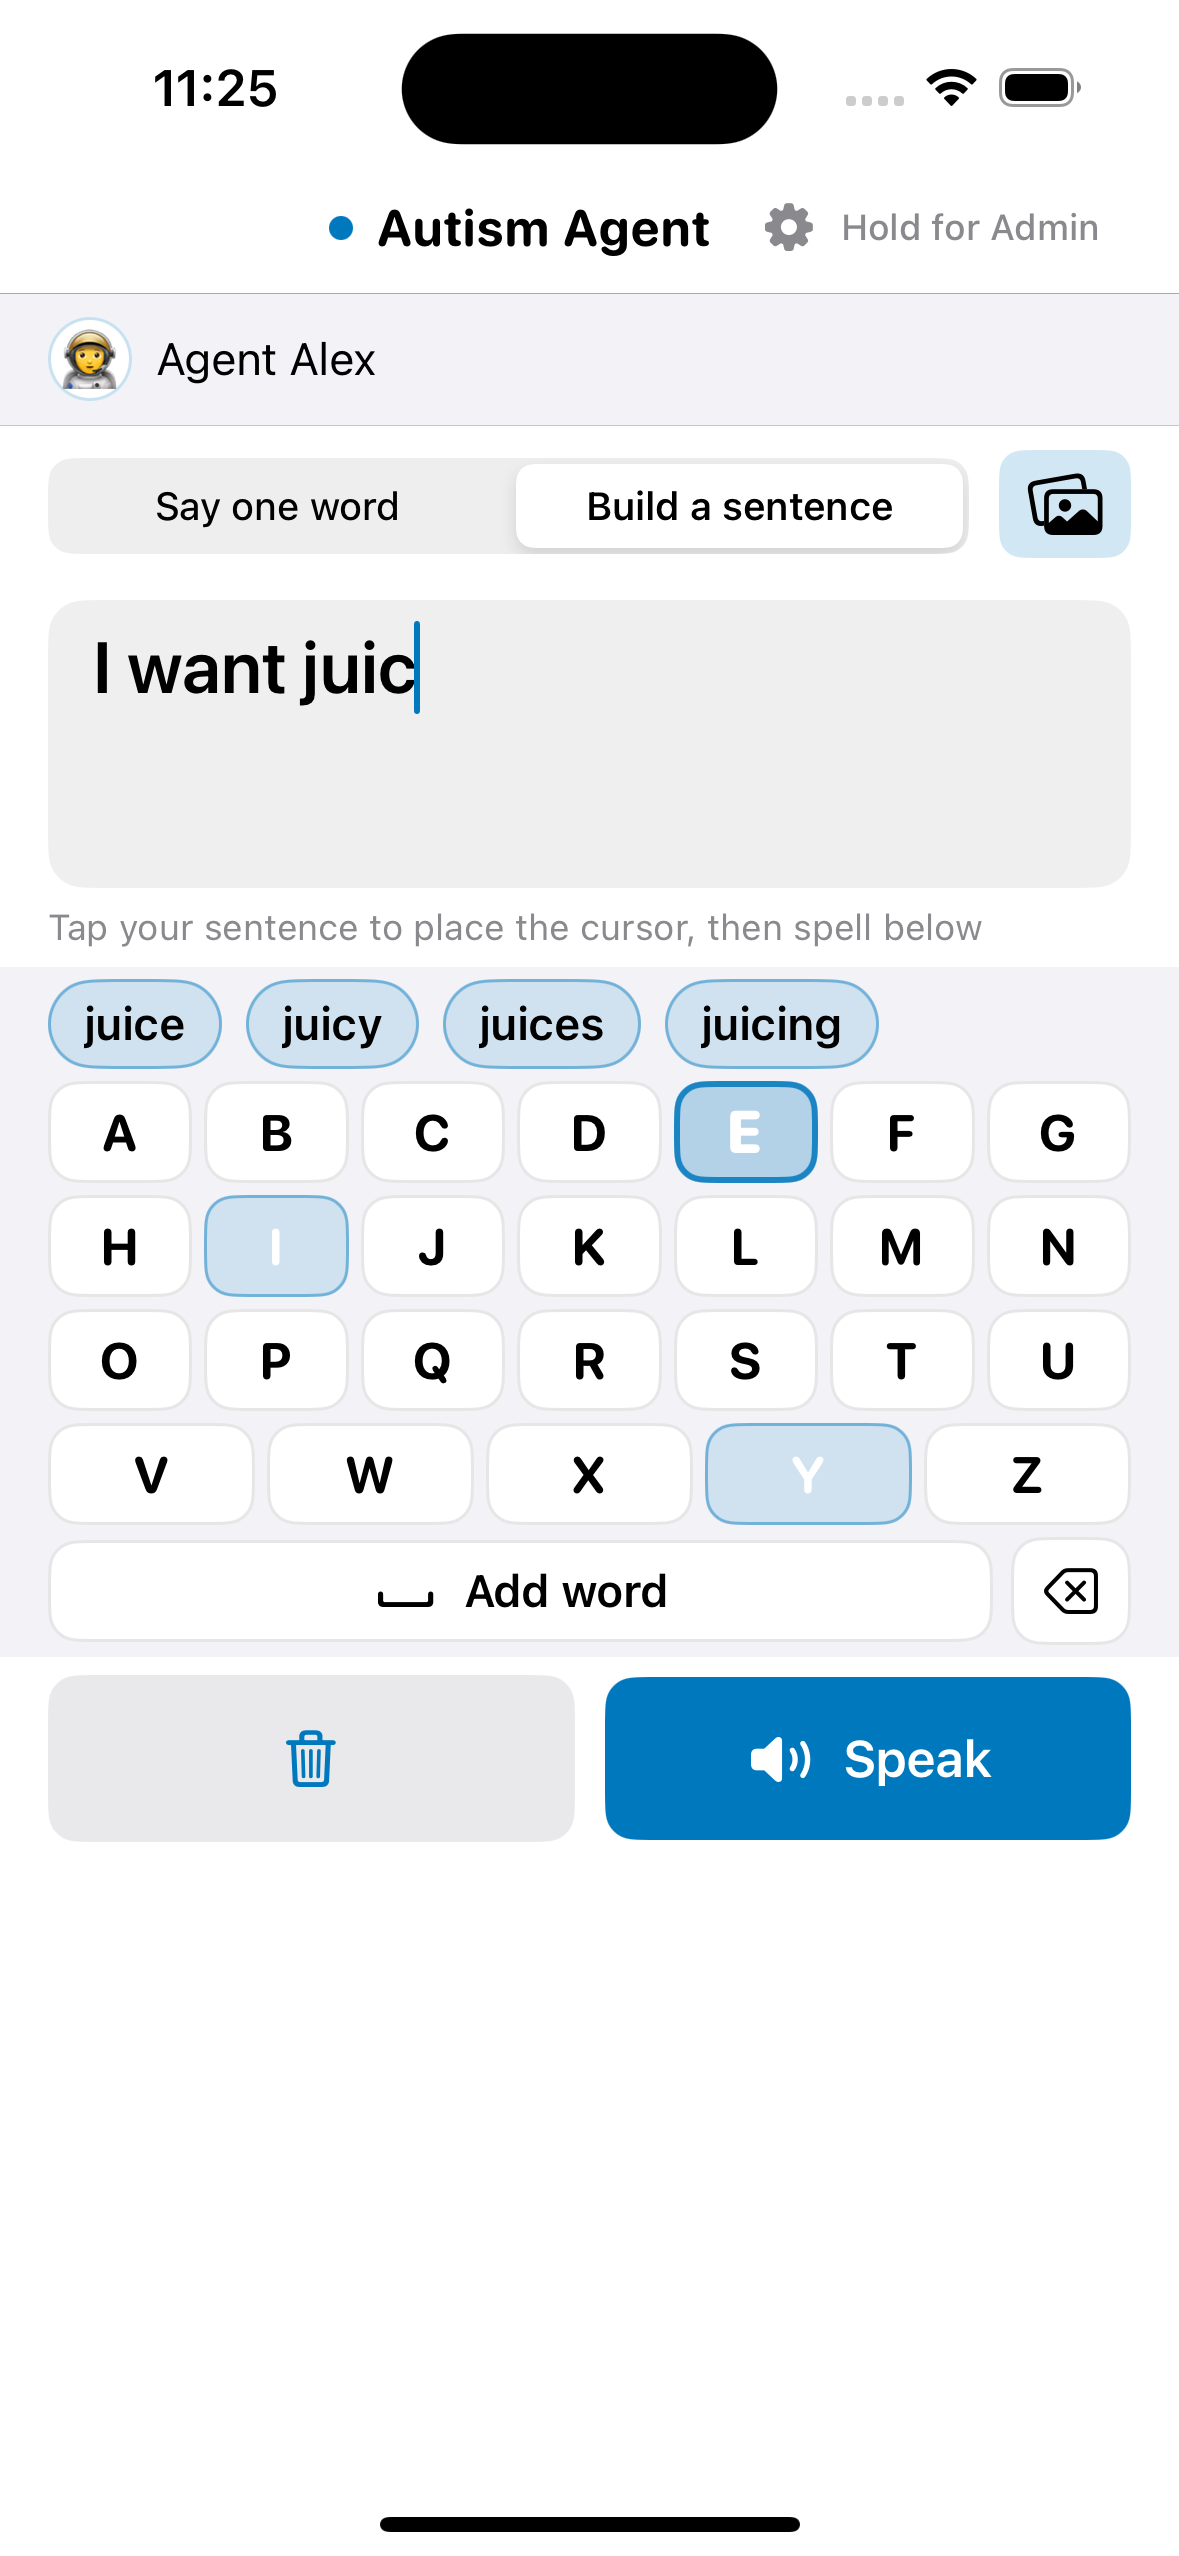
5. Keyboard and spelling
Type words that are not on the board — names, places, or anything new.
-
Open the keyboard
Tap the keyboard icon on the mode bar (or tap the sentence bar). Picture cards hide and the alphabet board appears.
-
Letter-by-letter spelling
Tap letters to spell. Highlighted keys show likely next letters. Word suggestions appear above the board — tap one to finish a word.
-
In sentence mode
Typed words join the sentence draft at the cursor. Tap the draft field to move the cursor, then keep spelling below.
-
Return to pictures
Tap the picture icon on the mode bar to show cards again. Keyboard edits save back to sentence chips automatically.
6. Admin — manage cards
Admin is hidden on purpose so the board stays safe. Only caregivers can open it.
-
Open Admin
Long-press the gear icon on the Speak screen (a normal tap does nothing). Authenticate with Face ID, Touch ID, or device passcode.
-
Add a card
Tap +. Choose a photo from your library or camera, enter the spoken label, and pick a category. Real photos of family and routines work best.
-
Edit or delete
Tap a card to edit its label, photo, or category. Swipe to delete cards you no longer need.
-
Categories
Create categories that match your child's world — school, therapists, favorite foods, daily routines.
-
Share (Plus)
With Autism Agent Plus, tap Share in Admin to send a family invite link. Manage participants from the same screen.
7. Control Panel
Open Admin, then tap the sliders icon for voice, display, and device settings.
Voice
Pick a system voice, speech rate, and pitch. Use Test voice before handing the device back.
Display
Adjust grid tile size, calm theme, and student-safe mode for a simpler board without agent decorations.
Behavior
Toggle speak-on-launch greeting, partner line, sentence sound effects, and sort-by-most-used.
Starter cards
Reload the full starter catalog or remove all starter cards for a blank slate. Quick Words re-pin after reload.
iCloud & Plus
Subscribe to Autism Agent Plus for backup and sync. After subscribing, fully close and reopen the app to start iCloud sync.
Rebuild from iCloud
If cards look wrong after reinstall, use rebuild to pull your library back from iCloud (Plus required).
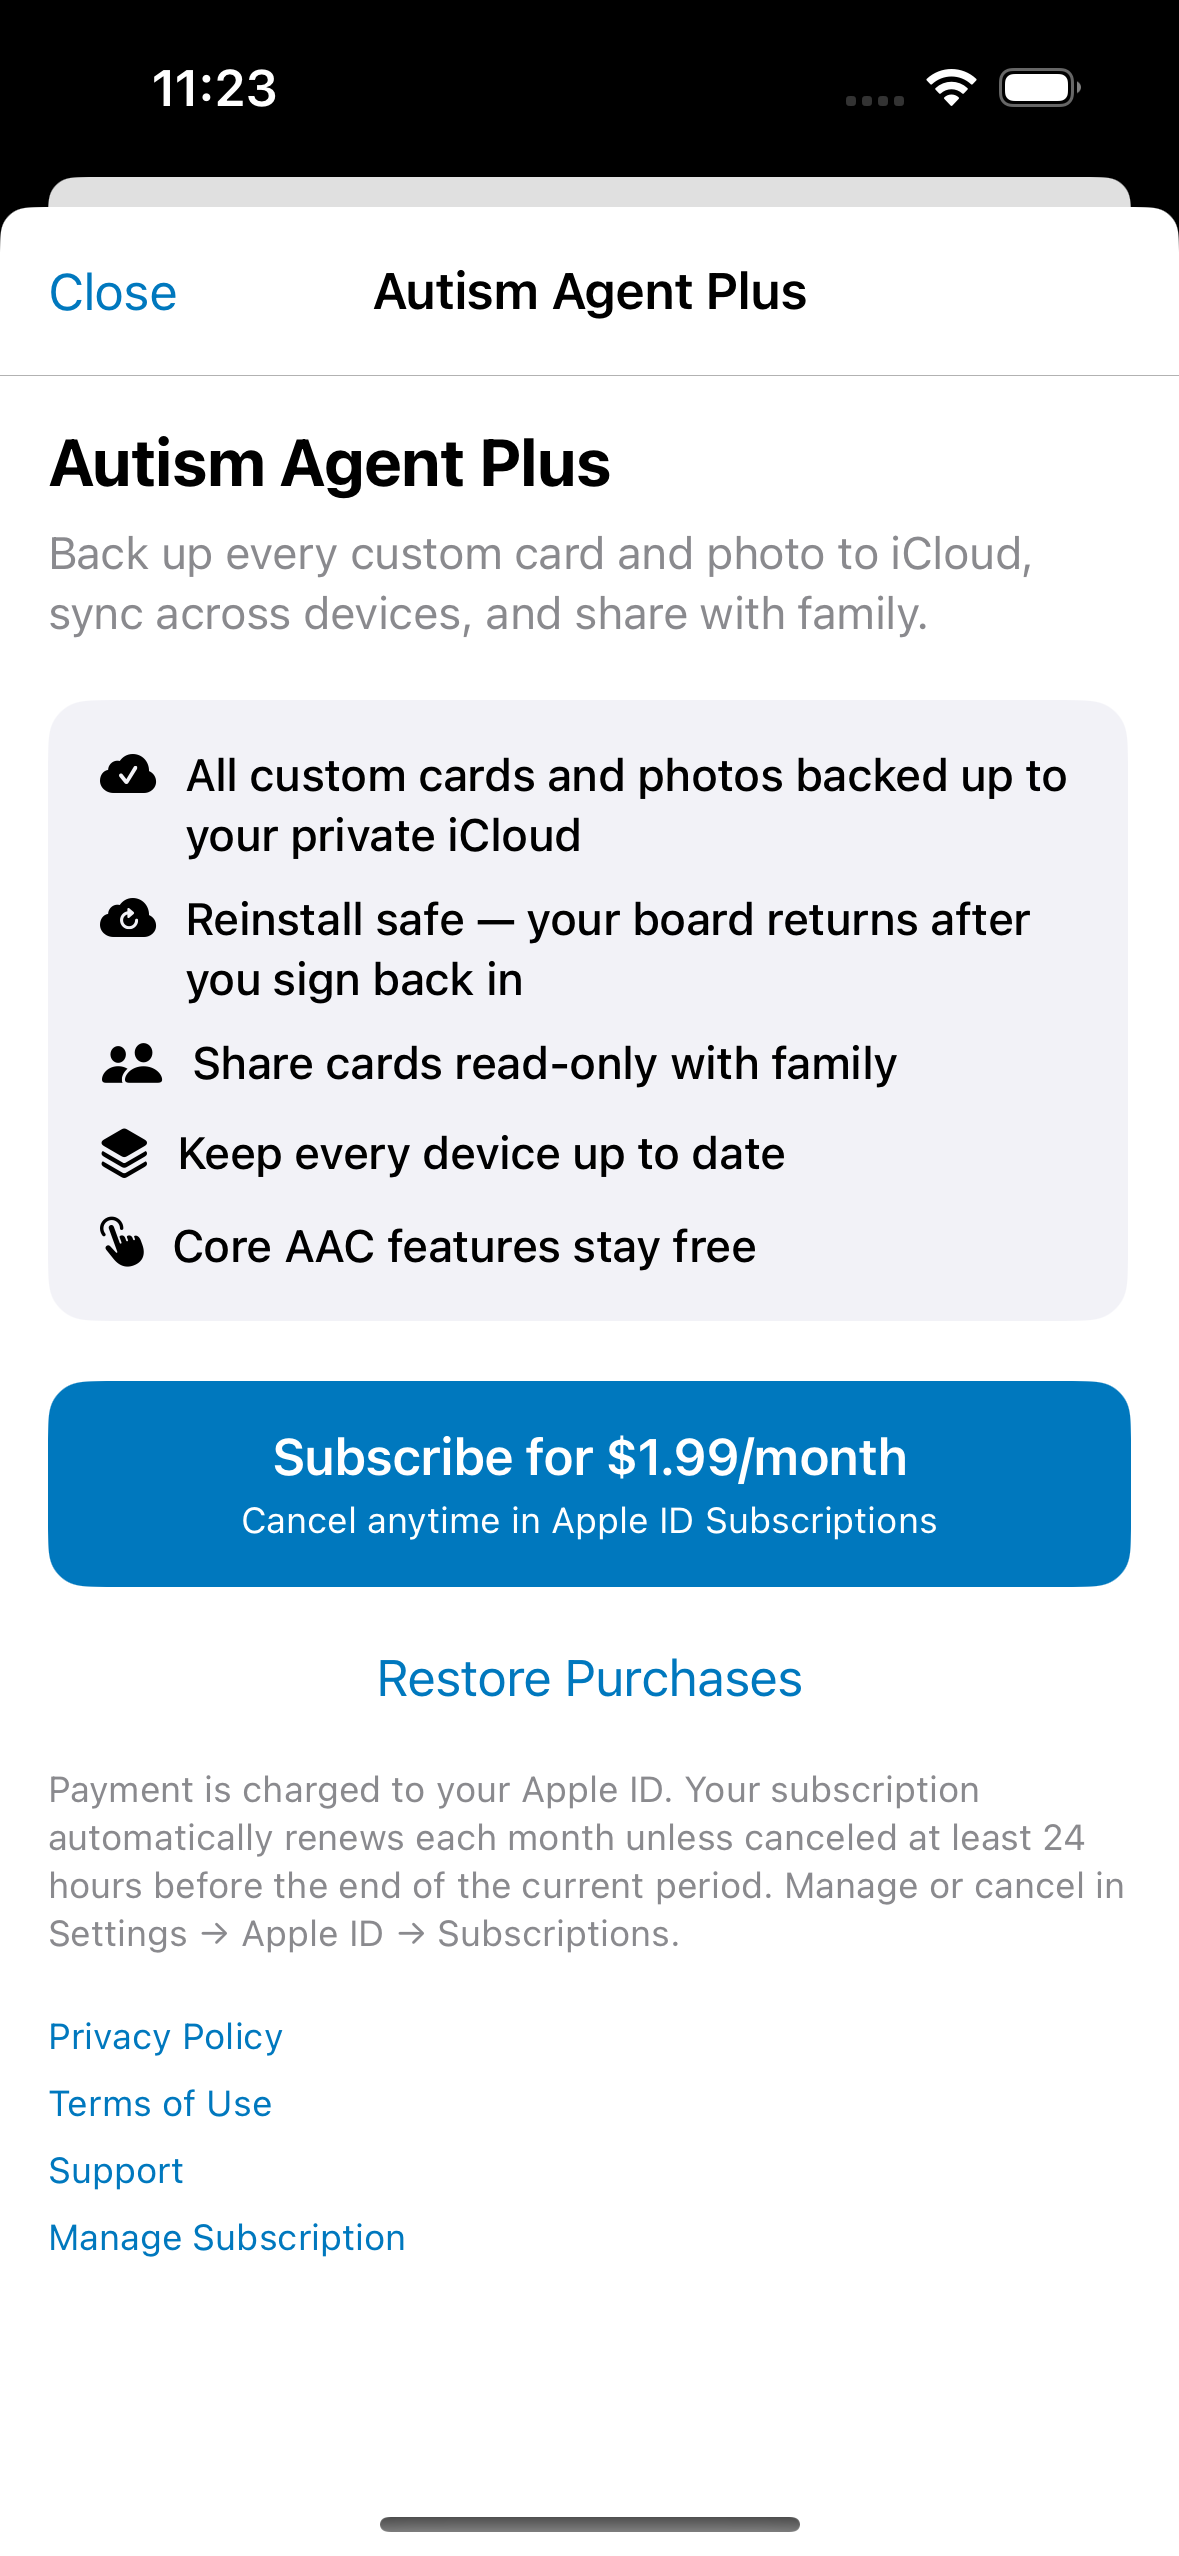
8. Family sharing (Autism Agent Plus)
Plus ($1.99/month) backs up custom cards and photos to your private iCloud, syncs across your devices, and shares read-only with family on their own Apple ID.
-
Subscribe on the caregiver device
Control Panel → Autism Agent Plus. Confirm the subscription, then force-quit and reopen the app so iCloud sync starts.
-
Send the share link
Admin → Share → send via Messages, Mail, or any app. You can stop sharing or manage participants later from Admin.
-
Accept on another device
The family member installs Autism Agent, signs into their Apple ID, and opens the link. Cards appear read-only — they cannot edit your library.
-
New cards sync automatically
Cards you add on the caregiver phone appear on viewer devices without sending a new link.
-
After reinstall
Sign into the same Apple ID, subscribe to Plus if needed, and open the original share link again if cards do not reattach automatically. See Support FAQ for rebuild steps.
9. Viewer-only device (child's phone)
-
Set device role
During setup or in Control Panel, choose Viewer only. Admin and card editing are hidden.
-
Accept the share link
Open the invite while signed into the child's Apple ID. Only shared cards appear on the Speak screen.
-
Same Speak experience
Tap-to-speak, sentences, keyboard, and categories work the same — just without management tools.
Two-device setup at a glance
Parent phone — Manages cards, adds photos, sends share link, Control Panel access.
Child phone — Viewer only, read-only board, no Admin.
Your iPad — Can be either role; set Device Role per device.
10. Tips and troubleshooting
- Long-press the gear — a quick tap never opens Admin; this keeps kids from changing the board.
- Use real photos — faces, foods, and places the child knows beat generic pictograms for daily use.
- Student-safe mode — hides space-themed chrome for a calmer, school-friendly board.
- Quick Words after reload — reloading starter cards re-pins core words automatically.
- Plus lapsed — your board stays in iCloud; resubscribe to sync again.
- Need help? — see the Support FAQ or email support@katoomi.com.